

The CMS running this blog is Movable Type version 4.2. I've been using Movable Type for years and I highly recommend it. My MT services are even available to you, but more on that later.
As much as I enjoy working in MT4, the documentation can leave you a little frustrated at times. This morning I wanted to implement code that would style comments left on this blog by me differently than comments left by you. I started with a Google search and couldn't find a solution that didn't involve installing a plug-in. I was sure you could do this in Movable Type "out of the box", so I hit up the MT documentation and forum. That was no help, although I did discover a new template tag that put me in the right direction.
If your blog or site is running on MT4, here's how I added author comment styling. Note: I see MT 4.31 actually has this approach in the default templates, but if you're like me, your templates were customized long ago.
1. Start commenting from within Movable Type's Manage Comments screen
In order for Movable Type to validate that the entry author's comment is indeed from the entry author, you have to start commenting on your own blog from within Movable Type itself.
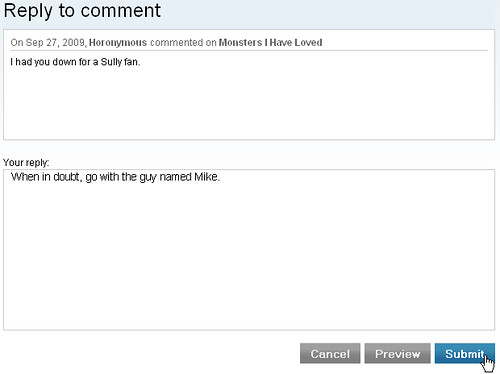
This is quite simple. To reply to a comment:
- Locate the comment you wish to reply to in the Manage Comments screen
- Place your mouse over the row of the comment you wish to reply to. When you hover over the row, the system will place a "Reply" link next to the comment title in the listing screen.
- Click on the "Reply" link, and the system will display the Reply to Comment screen
2. Harness the power of <MTIfCommenterIsEntryAuthor>
This is the aforementioned new template tag in version 4. With this tag, you can edit your "Comment Detail" template module for the desired effect.
Here's my solution:
<MTComments>
<div class="<MTIfCommenterIsEntryAuthor>mycomment
<MTElse>comment</MTElse></MTIfCommenterIsEntryAuthor>" id="comment-<$MTCommentID$>">
<a id="c<$MTCommentID pad="1"$>"></a>
<p><span class="bigger bold"><$MTCommentAuthorLink default_name="Anonymous"$></span><br /><span class="timecheck"><a href="#comment-<$MTCommentID$>"><MTCommentDate format="%B %e, %Y / %H:%M"></a></span></p>
<$MTCommentBody$>
</div>
</MTComments>
In a nutshell, if <MTIfCommenterIsEntryAuthor> is true, serve up the CSS class name "mycomment". If it's not true, serve up the HTML with the CSS class name "comment".
3. Define the "mycomment" style in your CSS
In step #2, we told MT to assign a unique class name to all comments from the blog entry author. In this final step, we're going to write CSS that will decorate such comments different than all other comments.
Here's the addition I just made to my CSS.
.mycomment {
border-bottom: 1px solid #6699CC;
border-top: 1px solid #6699CC;
background-color: #F5F5F5;
}
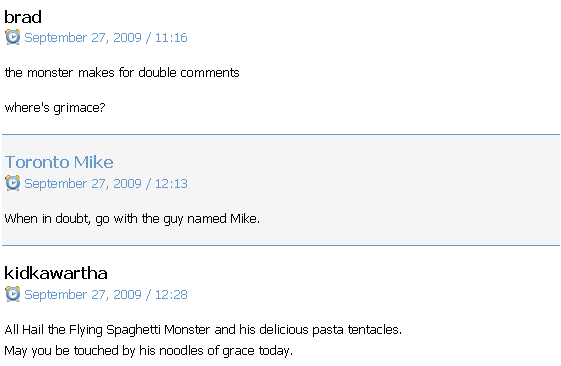
In a nutshell, when the comment is surrounded by a div tag with the class name "mycomment", the browser now adds a blue bar to the top and bottom and adds a background colour. By the time you read this entry, I very well may have changed the CSS style for author comments, so here's a screen cap of how it works right now.
It's as easy as 1, 2, 3. Now you'll immediately know the difference between my comments and others.
If you need help with implementing this change on your Movable Type blog, or if you're looking for an easy-to-use, fully customizable hosted blog or site / blog hybrid optimized for conversions, SEO and non-geek usage, contact me and we can do it together.